The
Crossbow > Chapter 22
> Construction >
Steel Bow , Bow Irons and Stirrup > p.104
|
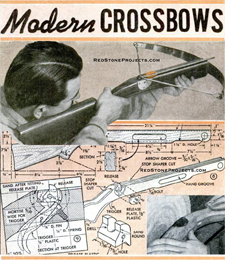
The Crossbow
short of that end of the oblong hole in the stock which is next the
nut, as shown at E, fig. 63, p. 106.

Fig. 60. - The Metal Stirrup: Its Front (I), Side (II),
and Top Bar (III). Scale 1/4 in. = 1 in.
The base of the stirrup fits close upon, and is the same width (1 5/8
in.) as the centre of the back of the bow.
Its base is 2 in. long inside, or 1/2 in. more than the thickness of
the stock, 1, fig. 60. This is necessary in order to give space for the
bow-irons to encircle the corners of the stirrup, when the stirrup and
the bow are placed in the opening in the fore-end of the stock, preparatory
to their being fixed in position by the wedges acting on the bow-irons,
figs. 61, 63, p. 106.
The crossbowman placed his foot in the stirrup, to enable him to hold
his crossbow firmly to the ground, whilst he bent its bow with the windlass;
or, in the case of small crossbows, as he drew the string to the nut with
his hands alone or by means of a rope and pulley. See fig. 77, p. 124 for
a crossbowman bending his steel bow with a windlass. |
Get a restored, printable copy of these Modern Crossbow
Plans with
Enhanced and Enlarged Figures and Illustrations and Searchable
Text.
|
|
Build and Shoot Modern Crossbows
|

|
PDF Format
|
All Orders Processed
On a Secure Server
|
|
|
|
Price $12.95
|
|
|
|
We will email your plans, to the address provided
with your payment, within 48 hours following receipt of your order.
|
10 Pages, Print Size 8.5" x 11"
|
|
Save up to 50% with Multi-Plan Deals
|
2 Plans $19.95 FREE Shipping
- Save Over 30%
U.S. Orders Only |
|
Get a Book of Catapult and Trebuchet Plans
Book of Catapult Plans
On Amazon.com
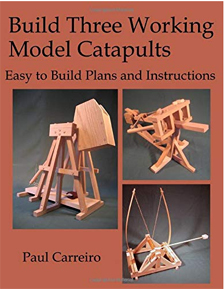
"Build Three Working Model Catapults, Easy to Build Plans
and Instructions"
|
 Build Three Working Model
Catapults, Easy to Build Plans and Instructions is ideal for anyone
looking to build authentic, working model catapults.
Build Three Working Model
Catapults, Easy to Build Plans and Instructions is ideal for anyone
looking to build authentic, working model catapults.
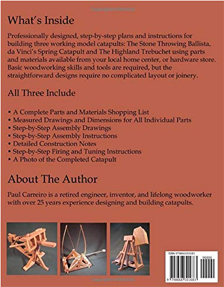
This book contains professionally designed, step-by-step plans and instructions
for building three working model catapults:
The Stone Throwing Ballista, da Vinci's Spring Catapult and The Highland
Trebuchet using parts and materials available from your local home center,
or hardware store.
The straightforward designs require no complicated layout or joinery
and include:
-
A Complete Parts and Materials Shopping List
-
Measured Drawings and Dimensions for All Individual Parts
-
Step-by-Step Assembly Drawings
-
Step-by-Step Assembly Instructions
-
Detailed Construction Notes
-
Step-by-Step Firing and Tuning Instructions
-
A Photo of the Completed Catapult
|
| Working Model Trebuchet Kit |
 |
 Trebuchet
Kit
Trebuchet
Kit
TK1
|
$75.00
FREE Shipping
U.S. Orders Only |

|
|
|
The trebuchet kit includes fully precut and drilled
frame parts, pins and axles, sling cord and sewn pouch, projectiles and
fully illustrated assembly and firing instructions.
Unlike the flimsy, snap together plywood trebuchet
kits, our all hardwood trebuchet kit does not require additional cutting,
trimming or shaping.
Requires only white carpenter's glue and a few
bar clamps (not included) to assemble.
Read
More >> |
Build a Trebuchet From Plans
 |
|
-
Materials Shopping List
-
Complete Parts List
-
Measured Drawings for All Parts
-
Step-By-Step Assembly Drawings
-
Construction Details and Notes
-
How a Trebuchet Works
-
Illustrated Firing Instructions
-
Illustrated Tuning Instructions
-
Picture of the Completed Trebuchet
|
| Fully Assembled Working Models |
|
daVinci
Trebuchet
T4 |
$299.00
FREE Shipping
U.S. Orders Only
|
|
| |
|
Inspired by the great war machines and siege catapults of Leonardo da Vinci
, this all Red Oak
hardwood trebuchet features
an open counterweight cabinet for range and trajectory adjustment.
Individually crafted from cabinet-grade red oak, the da Vinci Trebuchet
stands 14 inches tall in the cocked position, 24 inches tall in the fired
position and will hurl a projectile up to 60 feet. Includes six projectiles
and fully illustrated instructions.
Read
More >> |
|